
Saturday 22 December 2012
Potted Shrimp: Chocolate and amaretto mousse with Hazelnut biscot...
Potted Shrimp: Chocolate and amaretto mousse with Hazelnut biscot...: One of my last exams at college was to create a 3-course meal for 4 people all for under £25. By the time I’d priced up for the...
Chocolate and amaretto mousse with Hazelnut biscotti.
One
of my last exams at college was to create a 3-course meal for 4
people all for under £25. By the time I’d priced up for the ingredients I
needed for my starter and main I was left with about £6. I really wanted to do
a chocolate dessert and
loved the chocolate ramekins we made in a class a few days before. So, with a
small budget I came up with the a simple chocolate mousse and a crisp biscotti,
the two different textures I think pair together very well and
make for a very tasty pudding. If you don’t fancy making the chocolate ramekins
just swap them for a glass tumbler or cocktail glass if you have them.
Chocolate and amaretto mousse with Hazelnut
biscotti.

Serves
4
Chocolate mousse:
150g
Dark Chocolate
4
Eggs separated
75g
Caster Sugar
50ml whipping
cream
3tsp
of Amaretto liqueur
Chocolate
Ramekins:
200g
Melted dark Chocolate
Biscotti:
125
Plain flour
125g Caster sugar
3/4tsp Baking powder
1
1/2 medium free-range eggs, lightly
beaten
55g/
Whole hazelnuts, shells removed
2tsp Almond essence
To make the chocolate ramekins, you will also
need; acetate strips and 60mm ring mold.
To
make the chocolate ramekins:
Melt
the chocolate in a bowl over hot water. Cut acetate strips to fit inside a 60mm
ring mold with a 5mm overlap. Spread chocolate onto the acetate and line into
the round rings. Flood the bottom of the rings with a thin layer of chocolate
and leave to set.
Break
up the chocolate and put it into a bowl. Bring a saucepan of water to simmering
point, then set the bowl over the pan of water until the chocolate melts, set
aside. Putt the egg yolks and 25g of the sugar in another bowl, set this over
the pan of hot water and whisk until the mixture starts to form ribbons.
NB: To test for ribbon stage, draw a ‘W’ with whisk in the bowl
leaving a trail of mixture, if it holds the impression for 1 second, it’s
ready.
Whisk
the egg white and the remaining 50g of sugar to stiff peaks. In another bowl,
whisk the cream to soft peaks.
Mix
the melted chocolate into the egg yolks until smooth and add the Amaretto.
Gently fold in the egg whites and then the cream. Make sure the mixture is at room temperature then pour the chocolate mousse
into the chocolate ramekins or glasses and leave to set for 2-3 hours in the fridge.
To
make the biscotti:
Toast
the hazelnuts in a pre heated oven at 200°c until lightly browned but not
burnt.
For
the biscotti; preheat the oven to 150°c. Line a baking tray with
greaseproof paper or Bakewell paper.
Mix
together the flour, sugar, baking powder and almond essence in a bowl until
well combined.
Mix in half of the beaten eggs until well combined. Gradually add the remaining
beaten egg, a little at a time, making sure all of the egg has been fully
incorporated into the mixture before adding more, until the mixture just comes
together as dough. It should be quite a stiff dough.
(NB: You may not need to use all of the egg.)
Add
the hazelnuts and mix well.
Divide
the dough into 3. Roll each portion into a sausage shape about 3cm in diameter
using your hands. Slightly flatten each portion of dough with the palm of your
hand.
Place
each portion of dough onto the prepared baking tray, leaving a good gap between
each portion of the dough to allow for expansion. Bake in the oven for 15-20
minutes, until pale golden-brown.
Remove
the biscotti from the oven and set aside for 10 minutes to cool and firm up.
Slice the biscotti into 1cm slices and return to the oven for 10 minutes or
until completely dry.
Friday 31 August 2012
Chicken Shawarma and Pitas

Bored of BBQ’ing burgers and sausages?
The answer is ‘probably not’ but, if you
fancy trying something different this summer on the BBQ, then you have to try
this; Yotam Ottolenghi’s Middle Eastern chicken shawarama sandwiches.
More of a kebab than a sandwich but,
absolutely bloody tasty. So much so, we’ve made them 2 weekends in a row now
and they will probably end up on the menu at least a few more times before
summer’s out. You can either griddle them on the hob or under the grill in the oven but for a really
great taste, stick the pieces of chicken on a skewer along with some red onions
and peppers and BBQ until just cooked. “Insanely great!”
Also, if you fancy making your own pitas to
go with it, try my easy pita recipe below. Before you know it, you’ll have your own
kebab shop up and running in no time!
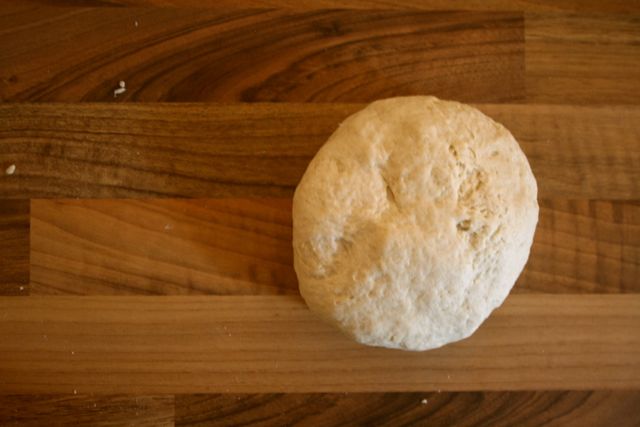
Pitas
150g of strong white flour
150g of plain white flour
3/4tsp of fast action yeast
1tsp of sugar
1tsp of salt
150ml of warm water
Sift the strong white flour into a large
mixing bowl. Add the sugar, yeast and water and mix well until smooth wet mix
is formed. Cover the dough with cling film and
a tea towel and leave in a warm place for 2 hours or until it has increased in
volume and you should see lots of air holes in the top.
When the wet mixture has risen and smells
yeasty, sift in the plain flour and salt and mix with a spoon until the dough
comes together. If it feels too dry, add more water, 1tsp at a time.
Knead for 10 mins until the dough feels
smooth and elastic. Divide into 6 equal pieces, roll into balls and place on a
lightly floured tray, cover with a clean tea towel and leave to prove until
soft and light to the touch, about 20-30 minutes.
In the oven, place the rack on the lowest shelf
and remove the top rack, put a baking tray in the oven on the lower rack.
Preheat the oven to the highest temperature it will go
Roll out three of the pitas into oval
shapes about 3ml thickness. Carefully slap the pittas onto the heated tray in
the oven and cook until they puff up, about 2 minutes. Turn them over and cook
for a further 2 minutes. Remove from the oven and keep them covered with a tea
towel until ready to serve.
Repeat with the three other pitas.
Tuesday 7 August 2012
Spiced Mackerel & Harissa Couscous

As part of our exams last term at college,
we had to produce a three-course meal for four people - all for just £8.50 and
cook it in less than two and a half hours. And I don’t mean £8.50 a head.
Strange task to be set that goes against what you’ve been taught i.e. to use
quality ingredients, which are generally not cheap. It certainly made us do our
research.
During June, at the time of the exam, mackerel are in abundance around the cost of south west England, and there should be no reason at all why you shouldn’t be able to buy them fresh, unfrozen and whole from any supermarket…… or so you would think. Well actually, out of all the major supermarkets I tried, Morrison’s was the only one, which had fresh Mackerel on their counter that hadn’t been previously frozen and for a reasonable price. This concept of freezing fish then defrosting it for the fresh fish counter baffles me? That’s supermarkets for you.
During June, at the time of the exam, mackerel are in abundance around the cost of south west England, and there should be no reason at all why you shouldn’t be able to buy them fresh, unfrozen and whole from any supermarket…… or so you would think. Well actually, out of all the major supermarkets I tried, Morrison’s was the only one, which had fresh Mackerel on their counter that hadn’t been previously frozen and for a reasonable price. This concept of freezing fish then defrosting it for the fresh fish counter baffles me? That’s supermarkets for you.
This was my main course, It’s an easy,
tasty summer dish which can be enjoyed either out in the sun or, inside on a
wet July evening. The simplicity of this dish would probably explain why I
didn’t get marked very well for showing much skill in the exam. Oh well, it
tasted damn good anyway!
Couscous:
1 Red Pepper:
½ tsp of dried chili flakes
½ tsp of ground coriander
Pinch of cinnamon
2tsp of tomato paste
1 Vegetable stock cube
4 garlic cloves
200g Couscous
Handful of chopped coriander
150g of diced cucumber
2 tbs of Olive oil
Mackerel:
1 tsp of ground cumin
1tsp of ground coriander
½ tsp of smoked paprika
1dsp of Oilve oil
2 Mackerel
Preheat the oven to 180°.
To make the Harissa; Under a hot grill,
roast the pepper until chard all over, transfer to a sealed bag and leave until
cool enough to handle.
Leaving the garlic cloves in their skins, wrap
in a small parcel of tinfoil and bake in the oven for 15-20 minutes or until
the garlic is just soft.
When the pepper is cool, remove the skin
and seeds and finely chop the flesh. Squeeze the garlic from its skin and add
to a pestle and mortar along with the pepper and spices, 2 tablespoons of olive
oil and the tomato paste.
Beat the ingredients together to a fine paste
cover and set aside.
Fillet the mackerel and remove any pin
bones, cut shallow diagonal lines down the skin.
In a large enough bowl, mix together the
spices and spread this over the fillets, leave in the fridge until ready to
use.
In a mixing bowl, add the couscous with a
tablespoon of olive oil mix well.
In a measuring jug pour 150ml of hot water
over the stock cube, stir until completely dissolved and add this to the
couscous. Add enough extra hot water to only just cover the couscous stir
briefly, cover with cling film and leave for 15mins.
When the couscous is cooked, stir it with a
fork until loose then stir in the harissa paste.
When the couscous is at room temperature
add the rest of the fresh ingredients, season to taste.
Cook the mackerel skin side up under a hot
grill until just cooked - about 6 minutes. Serve on top of the couscous and
garnish with coriander and lime wedges.
Monday 23 July 2012
Flaky pastry
Ingredients:

 Rub the butter into the flour. With your palms facing upwards and using your thumbs, rub the fat in to the flour until the butter is well mixed in and there are no large lumps left. Add 145ml of water to the flour and mix well with a knife.
 Now using one hand to mix, add a tablespoon more water at a time until the dough is formed, you might not have to use all the water. The dough should be soft but not sticky. Mix the dough until it feels like it’s coming together to a medium soft texture, adding more water as necessary. Start bringing together to a ball. If there is any flour left in the bottom of the bowl, add another small dash of water to bind it together until all the flour is incorporated. Turn the dough out onto a floured work surface.
 Need for 1 minute until smooth and shape into a ball. Wrap in cling film and leave in the fridge to rest for 20 minutes.
Flour your work surface and roll the pastry out to a long rectangle, just a little longer then your rolling pin and about 5 ½ inches wide. Be careful the dough does not become to thin, it should never get thinner than a £1 coin. Square of the ends to make a neat rectangle.
 Now, with a knife, mark lightly into thirds.
 Using a pallet knife, dot the top two thirds with half of the lard.
 Now, carefully fold the bottom third up over the middle. Using a pasty brush, brush of any excess flour then, fold the top third over the middle. Seal the edges, pushing down with a rolling pin.
 Now, carefully fold the bottom third up over the middle. Using a pasty brush, brush of any excess flour then, fold the top third over the middle. Seal the edges, pushing down with a rolling pin.

300g of plain flour, sieved.
1tsp of salt.
75g of lard chilled
75g of butter chilled.
165ml cold water.
Weigh the flour directly into a sieve,
which should be resting over a large mixing bowl, add the salt and sieve into the bowl.
Weigh out the butter and lard, take half
the butter and chop into small pieces, add to the flour mixture. Cut the lard
into quarters and the remaining butter in half as shown below. Cover and place
in the fridge.


Flour your work surface and roll the pastry out to a long rectangle, just a little longer then your rolling pin and about 5 ½ inches wide. Be careful the dough does not become to thin, it should never get thinner than a £1 coin. Square of the ends to make a neat rectangle.


Give the pastry a quarter turn clockwise and roll out to a long rectangle again. Repeat as before marking into thirds but adding the butter this time and folding in the same way. Fold and roll again but using up the rest of the lard, then give one more roll and fold without adding any fat. Remember to seal the edges after folding.
Chill for 20 minutes and use as required. The pastry will keep in the fridge for up to 48 hours and 2 months in the freezer.
Cornish steak and ale Pasty

Back from another summer
break in Cornwall on the Helford River, and a rather wet one it was too. Up
until now we’ve been extremely lucky with the weather on holiday in the foot of
England. However, on this occasion the sun was nowhere to been seen. In fact I
don’t think I’ve ever been on a holiday and witnessed so much rain…However, it
wasn’t all that bad, in fact far from it. It was a much needed break after a
busy first term at catering college, which has been fun but exhausting and a
real eye opener into the professional world of cooking. (See my other blog)
Although the weather was awful, as usual,
Cornwall did not let us down in the food department. Fresh local fish every evening,
and a few great meals in local restaurants - the new yard at Trelawarren to name
just one. A small bistro style restaurant nestling away in the midst of an old country
estate, surrounded by woodland, not far from Helston. Serving creative dishes
with ingredients from just a stone throw away, in a simple but smart restaurant
with friendly service. In fact it was so good we went back for breakfast on our
last day.
Our small cottage kitchen was simple to say
the least, but as usual half my home kitchen came with us in the boot of the
car. And, thanks to the bad weather I spent a great deal of time in the
Kitchen.
Cornish Pasties, who doesn’t like them?
What’s not to like about them? Beef, potato, swede and carrot wrapped up in
flaky pastry, the perfect accompaniment to a cold, wet walk in the country. Fitting
nicely in the jacket pocket too. And we certainly did have a fair few wet and
windy walks. So, after some thorough research (which mainly involved eating a
lot of bakery pasties) and using my new pastry skills, I believe I have a
rather tasty recipe for a ‘proper ‘ansome
pasty!’
Cornish steak and ale Pasty
Makes 3 large pasties.
Ingredients:
450g of braising steak or beef skirt
260g of potato peeled and diced into 1cm
cubes.
2 medium sized carrots, peeled and diced.
1 medium onion finely diced.
Small bottle of Cornish ale.
Salt and pepper
Cooking oil.
Prep all the veg, cut into roughly 1cm
cubed. Mix it all in a bowl, cover and leave to one side. Remove any fat and
gristle from the beef but keep any small bits of soft fat. Cut the beef into
small bite sized pieces.
In a medium sized pan (with a lid) , add 1dsp
of vegetable oil and put on a medium heat. When the pan is hot, add the beef in
batches and fry until just colored all over. When all the beef is browned off,
pour in the ale - just enough to cover all the beef. Season well with salt and pepper, put a lid on
the pan and simmer on a very low heat for 45 minutes.

Remove the beef from the
pan and set aside in a mixing bowl and reduce the cooking liquor on a high heat
until reduced by two thirds.
Now add this sauce to the mixing bowl with
the beef and leave to cool completely before adding the vegetables and mixing together
well.
Preheat your oven to 200°c and make sure the shelf is in the middle of the oven. Find a dish or bowl, which is no larger than 20cm in diameter. We’re going to use this as our template for
cutting the pastry.
Flour your work surface
well. Start to roll out the pastry just a little larger then the diameter of
your template, keeping your fingers spread out to roll the pastry evenly.

Now roll out the pastry length ways, long
enough to fit three rounds in. Using your template, cut around the circle with
a sharp knife. Remove the circles and keep the excess pastry to one side, just
incase….
Season the pasty filling well and taste to
make sure there is enough salt and pepper.
Have everything ready to
go before filling the pasties. You will need a small bowl of beaten egg, a
pastry brush, a baking tray lined with baking parchment and your oven is at 200°c.

Spoon equal amounts of filling on each round - not too much but
don’t be stingy. Brush the rim of the round with beaten egg mix and carefully
fold the top of the circle over the bottom half. Seal round the edges with side
of you palm.

Brush around the edge again with just a little egg. Using one finger to push down and pinching a small amount of pasty in the other, start to fold over the edge to crimp the sides together.

Place the pasties on the
baking tray; glaze with egg wash and with a sharp knife make a small hole in
the top for steam to escape. Bake for 40 minutes until golden brown. To make
sure the middle is cooked, poke a knife through the middle of one pastie, it
should slide through easily if the potatos are cooked. Cool slightly on a wire
rack.
Wednesday 7 March 2012
The Pastry Tart
As
satisfying as it can be to execute good pastry, it is at the same time, I’m
sure, the most bloody infuriating food to work with. Crumbling apart while rolling
it, sticking to every surface available, sinking to the bottom of the flan dish
or burning to a crisp in the oven. Making pastry has the potential to be a
f@!*ing nightmare! It always makes me chuckle watching my girlfriend making
anything flour based in the kitchen, as soon as that flour pot comes out of the
larder, stress levels immediately rise; at this point I usually make a swift
and quiet exit out the kitchen. But it really doesn't have to be stressful,
honestly...
To
get pastry right, you have to get it wrong in pretty much every way possible
first, and, when you start getting it right, you won’t stop making it. I’m
fairly confident, now that I’ve cocked it up so many times, I think I have
finally mastered it and I’m prepared to try and explain the process as best I
can so you don’t have to cock it up!
Sweet
Pastry
Note: Apologies for
the length of this recipe but, there's a lot to explain here so read carefully!
250g
of plain flour
125g
of icing sugar
125g
of butter diced and chilled
1
small capful of vanilla extract, or half a pod of vanilla scraped out.
Pinch
of salt
2
large egg yolks.
You
will also need a flat rimless baking tray.
A
rolling pin
Cling
Film
Baking
parchment
Baking
beans or copper coins
Flan
dish with a wide rim and removable base
Now
I’ve tried mixing the ingredients in a blender and I’m sure the results are not
nearly as good as when mixed by hand so, to make it easier to mix by hand, the
first thing to do is dice the butter up nice and small so the cubes are easy to
work into the flour with your fingertips. Once you’ve diced the butter, put
them in a bowl and leave in the fridge to chill for 20 minutes. There’s a
debated point in making pastry; whether to have soft butter or chilled butter?
Having chilled butter I believe allows the mixture, when mixed by hand, to
produce a nice crumbly texture before binding it together, which makes for a
crisper shorter pastry when baked. Use soft butter and the butter will melt
into the flour too quickly causing the gluten in the flour to start to stretch
and mix and you will end up with a soft, doughy pastry when baked.
Sift
the flour, followed by the icing sugar into a large bowl with a pinch of salt.
Make a well in the center and add the diced butter, mix together with a knife
so all the cubes of butter are coated in the flour. Start to mix the butter and
flour, rubbing together with your fingertips, this part takes time but with
patience will produce the best pastry. When the mixture starts to come together
like fine breadcrumbs, stop, make a well in the center of the flour mix, and
add the 2 egg yolks and the vanilla, mix together with a knife. Tip the whole
lot out on a clean work surface and gently bring together, if the mixture feels
too dry, add a desert spoon of cold water. Very briefly, gently kneed the
mixture together with the palm of your hand, It’s important not to over need,
only for about 20-30 seconds, you just want the pastry to bind together, a good
point to stop is when the outside of the pastry just starts to become very
slightly oily.
Flatten
the ball of pastry slightly so as to allow it to chill evenly, wrap in cling
film and leave to rest in the fridge for 45 minutes.
Next
we’re going to roll the pastry out on cling film (my AMAZING sister taught me
this tip), reason being it will stop the pastry sticking to the surface and
falling apart, it will also make it much easier to move around when we
eventually put it in the flan tray. Lay a large enough peace of cling film on a
clean surface followed by a second piece which, should overlap the first by
about 10cm so as to give a good sized surface area to roll onto, dust sparingly
with flour. Gently roll out the pastry on top of the cling film until it’s
about the thickness of a pound coin and large enough to fit in the flan dish.
Now, with your flat rimless baking tray, gently slide it under the cling film
and pastry, place the flan dish upside down in the center of the pastry (can
you see what’s gonna happen here yet?) then gently flip the whole thing upside
down so the pastry is the right way up in the flan dish. Now, keep the cling
film on and slowly smooth the pastry down the sides of the flan dish, gently
pushing it into the sides with the back your knuckle. Remove the cling film
when the pastry is evenly spread in the dish, cut off the excess pastry from
the sides leaving about an inch hanging over the edges (we’ll cut this off
after baking), then put the whole thing back in the fridge for 20 mins resting.
For
the blind baking, cut enough baking parchment to fill the dish, crumple it up
then flatten it out again, making it easier to fit in the dish. You can use
either baking beans or copper pennies to place on top of the parchment to keep
the pastry from rising, bake in a preheated oven at 140° for 20 minutes or
until lightly golden in color, if you have a fan assisted oven it’s always a
good idea to turn it at least twice during baking for an even color. Remove
from the oven and take out the baking parchment, you’ll find that the base of
the pastry is slightly fluffed up, with the back of a spoon gently smooth it
down again then place back in the oven at a slightly lower temperature of 120°
until the base of the pastry is crisp. Remove
from the oven and allow to cool on a baking rack. When the pastry has cooled
trim up the edges with a sharp knife, the pastry casing should be nice and
crisp now so no need to egg wash it or anything before adding what ever mixture
you are using to it.
Subscribe to:
Posts (Atom)